Introduction
This article will describe how to connect Atomsenses Indoor LoRaWAN Gateway to ThingsBoard.
ThingsBoard is an IoT platform for data collection, processing, visualisation, and device management. The platform enables device connectivity via industry-standard IoT protocols or stream data from devices connected to existing IoT Platforms. The platform supports both cloud and on-premises deployments, combining scalability, fault tolerance, and performance so that the users’ data remains safe.
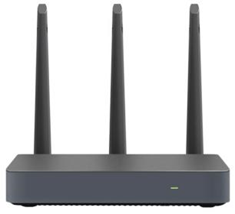 The Atomsenses indoor gateway, acting as a wireless communication base station, has the ability to simultaneously receive 8 LoRa wireless signals. It can forward wireless data to the core network through Ethernet or 4G. Additionally, it can send data from the core network to node equipment, which enables the update of node configurations and the implementation of control commands. This gateway is widely utilized in various settings such as communities and parks to provide reliable LoRa network coverage, ensuring a safe and stable LoRa network service.
- Supports standard LoRaWAN protocols V1.0.2, V1.0.3, V1.1 CLASS A/C.
- Features 8-channel concurrency for uplink and 1-channel for downlink.
- Comes with a built-in supercapacitor.
- Offers multiple backhaul connectivity options.
- Has an internal antenna design.
- Embeds a network server and is compatible with multiple network servers.
- Adapts to global LoRaWAN® frequency plans(CN470 - 510/EU863 - 870/US902 - 928/AS923/AU915 - 928/KR920).
After following the steps in this guide, you will have a successfully connected and configured gateway on a network server integrated with ThingsBoard. This will allow you to add devices, receive data from them, and process the data effectively.
Gateway Connection
Connecting via Mobile Phone
1. Open the WiFi settings on your mobile phone and search for the gateway's hotspot. The hotspot name begins with "WIFI-05" followed by 6 characters of the gateway ID, for example, "WIFI- 05_e33223". The initial password is "gateway2018better".
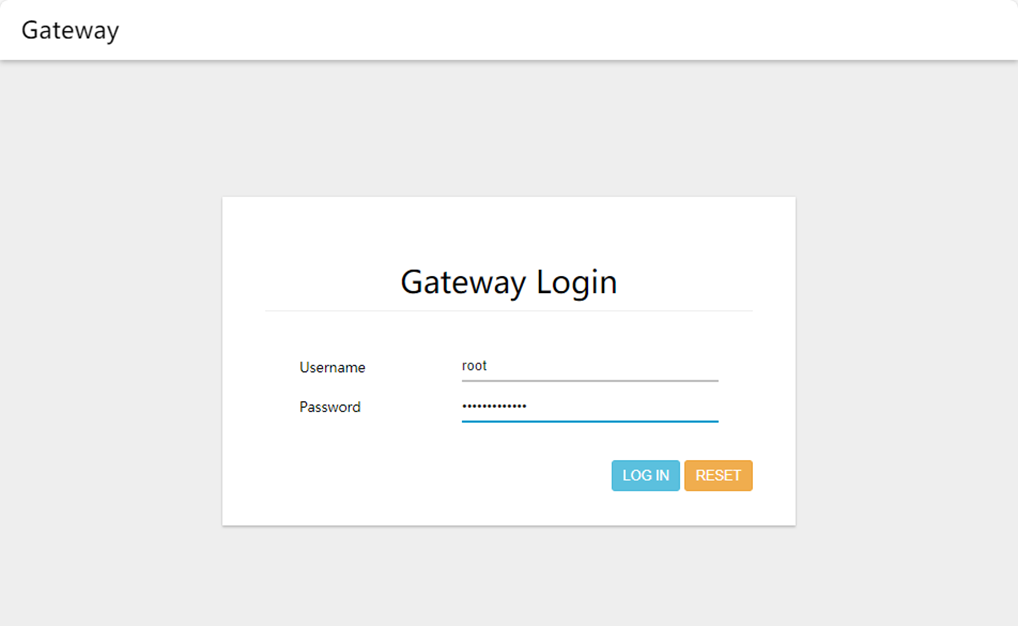
2. Use your mobile phone browser to access "192.168.3.1". This will take you to the gateway's web interface. Log in with the username "root" and password "WelcomeTo2018".
Connecting via Laptop
1. Connect the gateway's LAN port to your laptop using a cable.
2. Set your laptop to acquire an IP address automatically.
3. Open the Google browser and enter "192.168.3.1" to reach the gateway's web interface. Log in using the password "WelcomeTo2018".
Configuration
- Chirpstack Configuration
Adding a Gateway on Chirpstack
- Network Server Address Setting
- Log in to the gateway's WEB configuration interface. Navigate to "Network" → "LoRa GW" → "Configuration" to reach the LoRa setting interface.
- Click to select the LoRa Network Server address and enter
the IP address of the Chirpstack server: 47.106.157.173
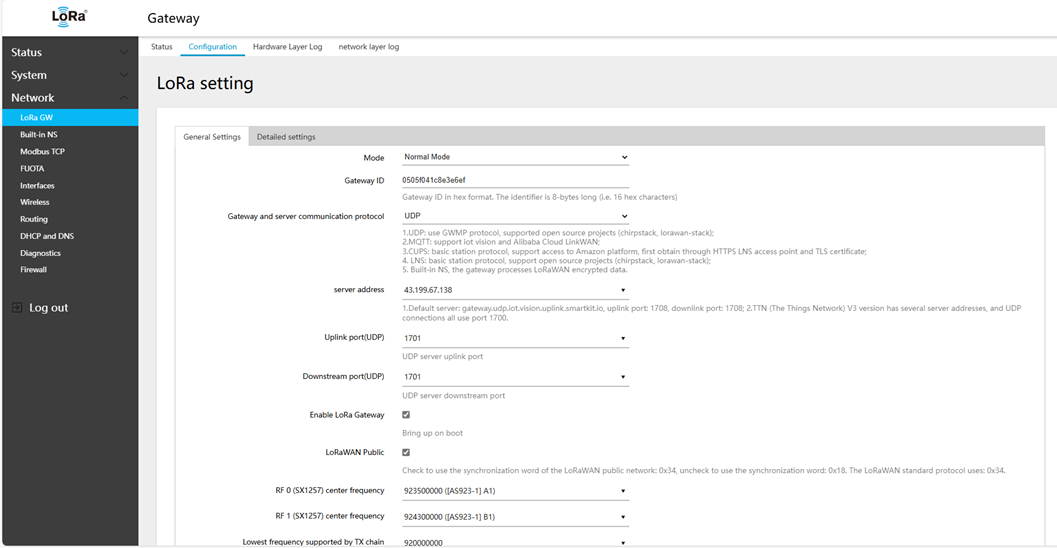
- Set Uplink and Downlink Ports
- The uplink and downlink ports are related to the UDP port of the Network Server. Click "custom" to manually fill in the UDP port number.
- Currently configured for AS923, AS923 - 2, and EU868:
- AS923 uses UDP 1701.
- AS923_2 uses UDP 1702.
- EU868 uses UDP 1700.
- The communication protocol between the gateway and the
Network Server is UDP.
- Connecting the Gateway on Chirpstack
-
Login
the Chirpstack configuration interface, select Gateways→ Add gateway
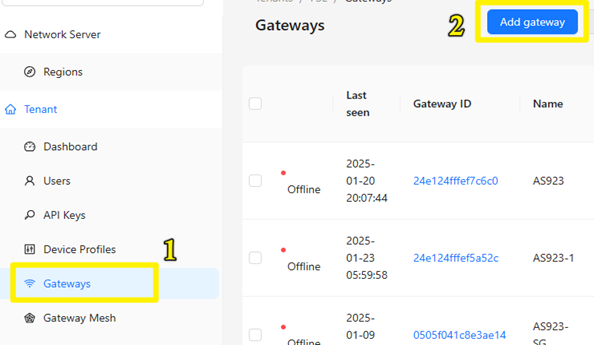
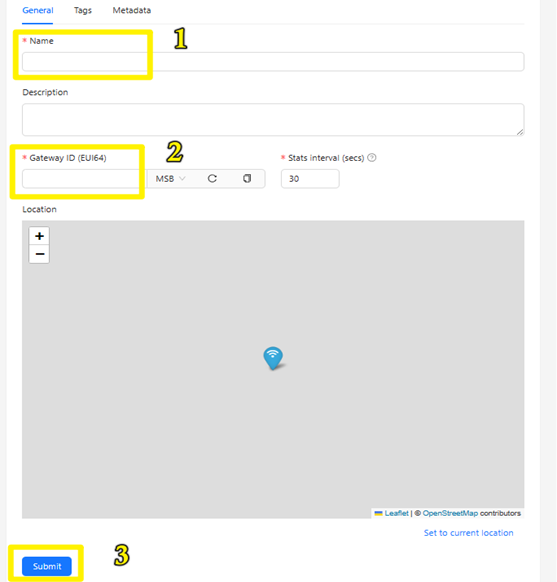
- Copy the gateway ID in the LoRa Settings screen of the gateway's WEB configuration interface
- On
the Add gateway page, enter the gateway name and gateway ID and select Submit.
-
Login
the Chirpstack configuration interface, select Gateways→ Add gateway
Configuring the Application on Chirpstack
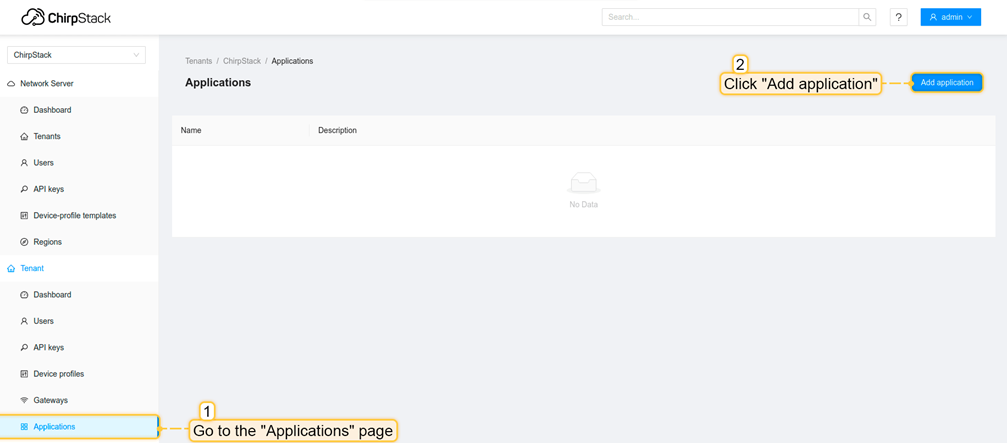
1. Go to the “Applications” page in the left menu and click on the “Add application” button.
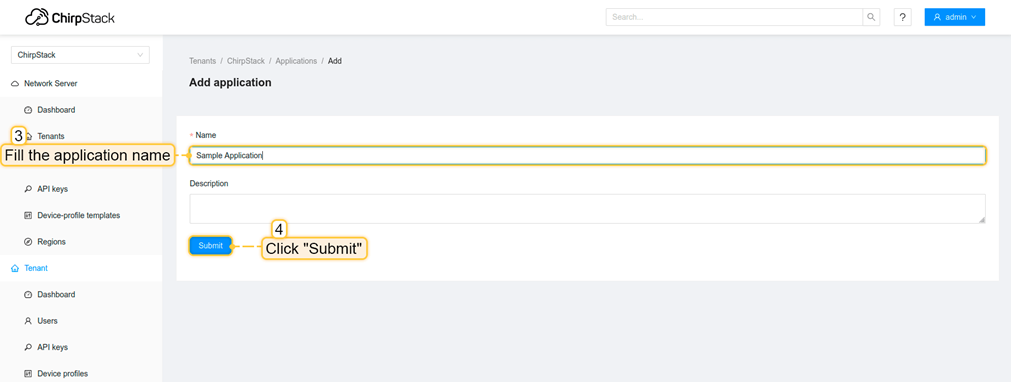
2. Fill application name and click on the “Submit” button.
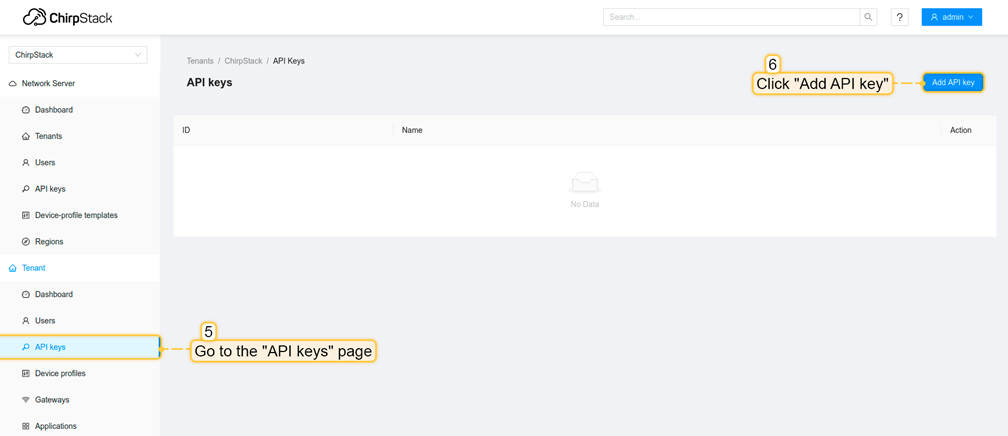
3. Go to the API keys page in the left menu and click on the “Add API key” button.
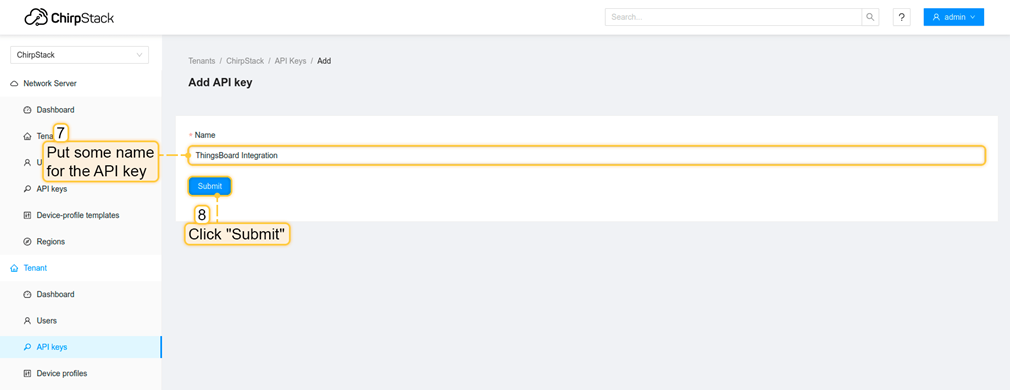
4. Put some name for the API key and click on the “Submit” button.
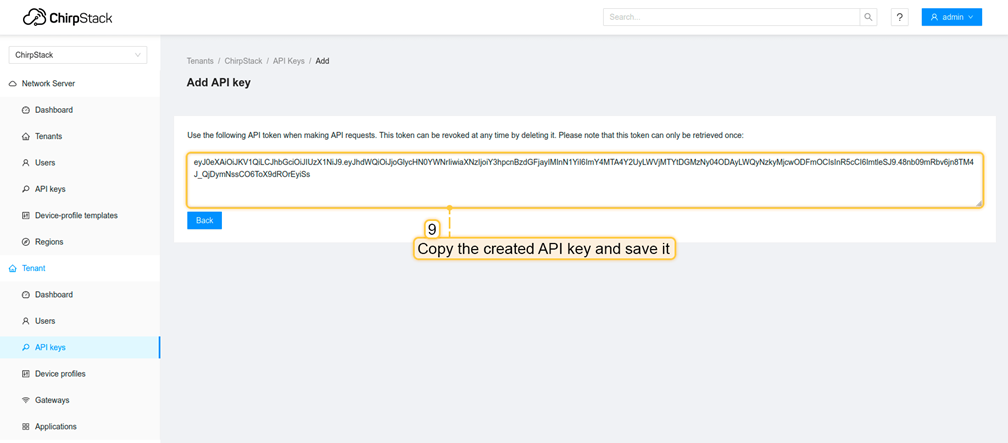
5. Copy the created API key and save it as it will be needed for integration with ThingsBoard.
Integrating Chirpstack with ThingsBoard
- Adding an Integration in ThingsBoard
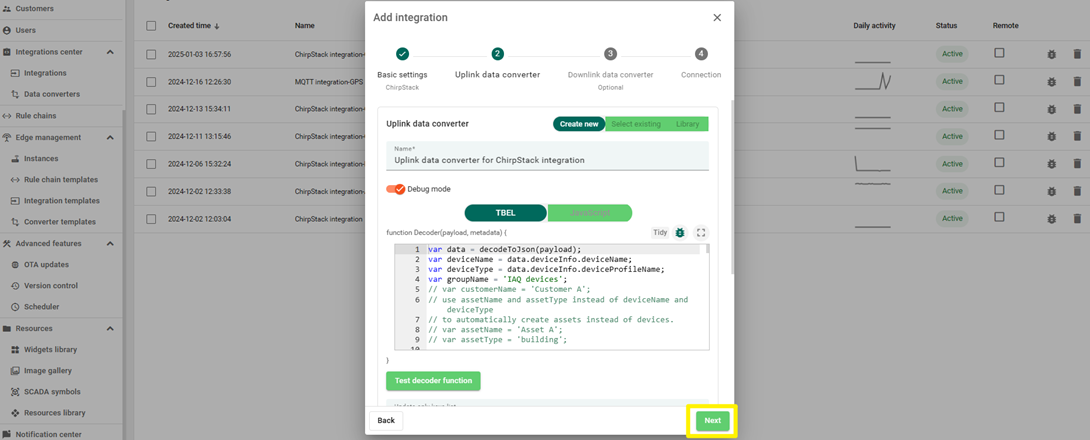
- Navigate to the “Integration center” section, then to the “Integrations” page. Click the “plus” button to add a new integration. Select the type “Chirpstack” and click “Next”.
- Click “Next” again.
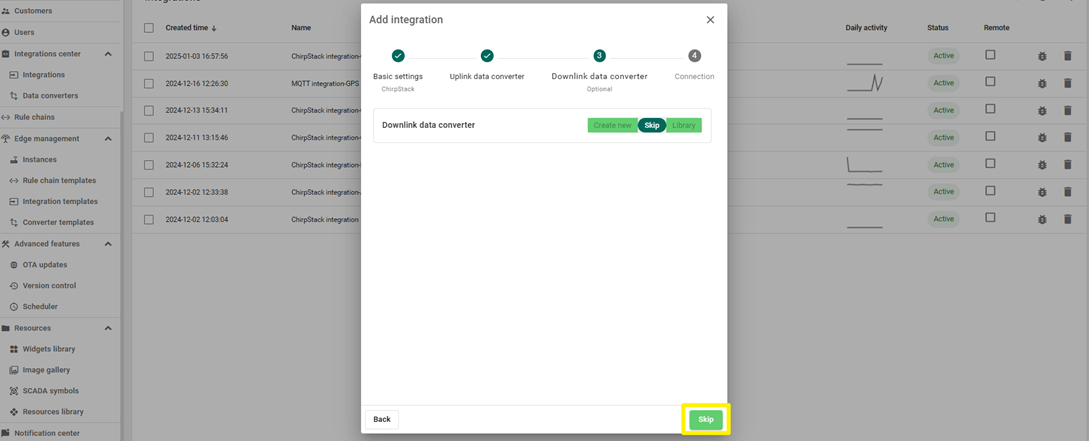
- Leave the “Downlink data converter” field empty and click the “Skip” button.
- Enter your “Application server URL” and “API Key” from
Chirpstack, copy the “HTTP endpoint URL”, and click the “Add” button.


- Configuring Chirpstack for the Integration
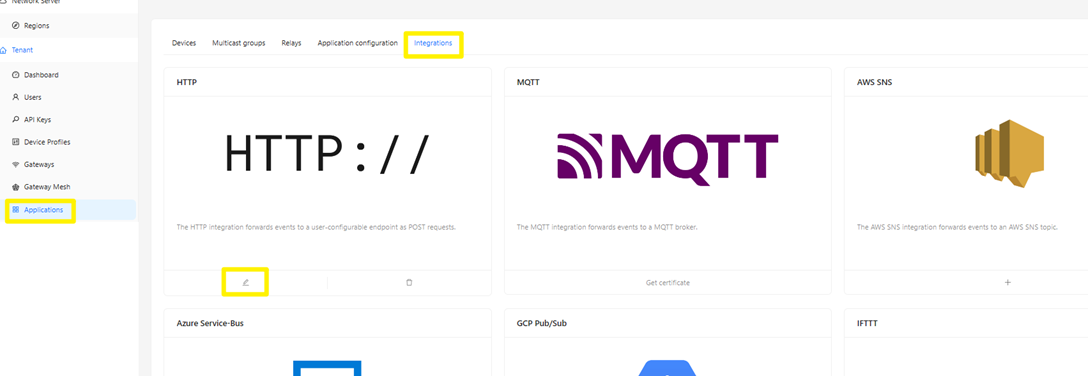
- Open your Chirpstack, go to the “Applications” page → Your application → “Integrations” tab. Find and click on the “HTTP” tile.
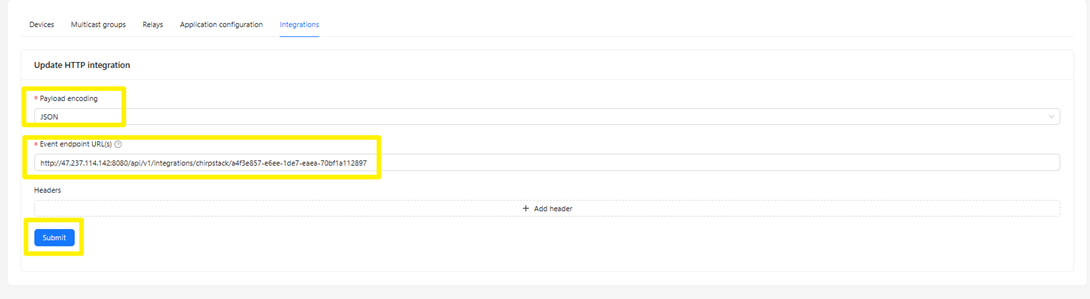
- Enter the “HTTP URL endpoint” into the “Event Endpoint URL(s)” field and click the “Submit” button.
After above steps you should have the gateway connected to Thingsboard via Chirpstack.
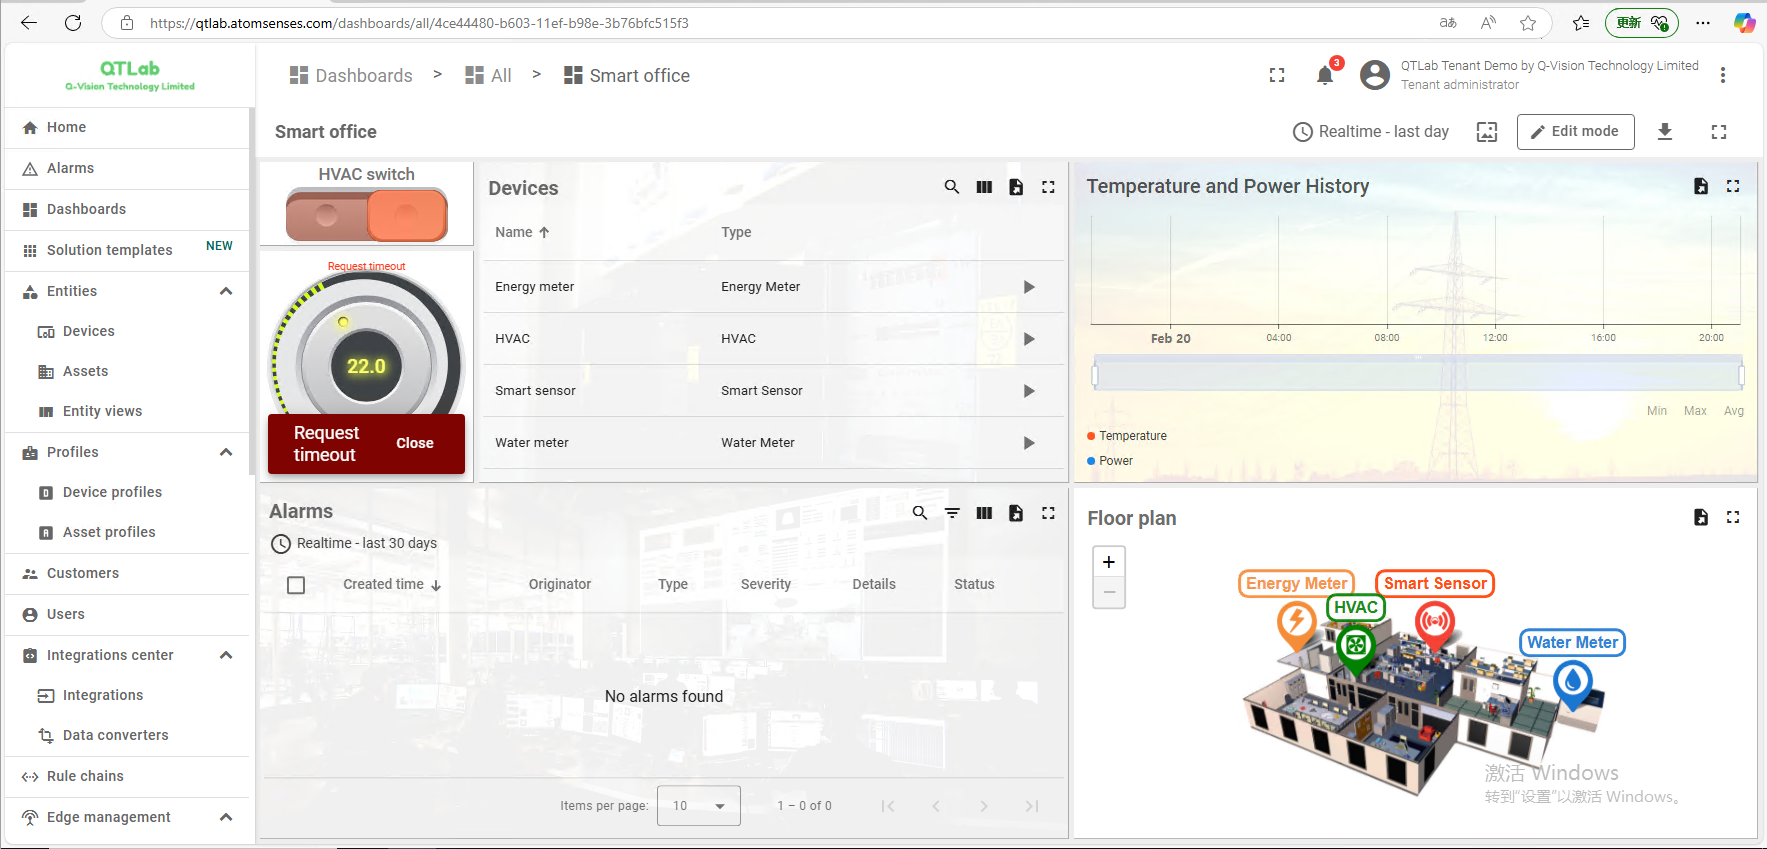
After adding devices, by sending data from the device, it will appear on the corresponding device page in Thingsboard. You can view the data in the Entities -> Devices menu or by creating a dashboard
About how to create a dashboard, please refer to : https://thingsboard.io/docs/user-guide/dashboards/